|
|
|
|
ESRI ArcGIS Pro 3.x Installation Instructions |
|
|
|
ArcGIS Pro downloads are available as a link from your WebStore Order or from your ArcGIS Online Account. Instructions for accessing the app from your ESRI account are available below. ***An active internet connection and browser login is required to license any new installs of ArcGIS Pro.**** |
|
|
|
|
|
|
|
|
|
|
|
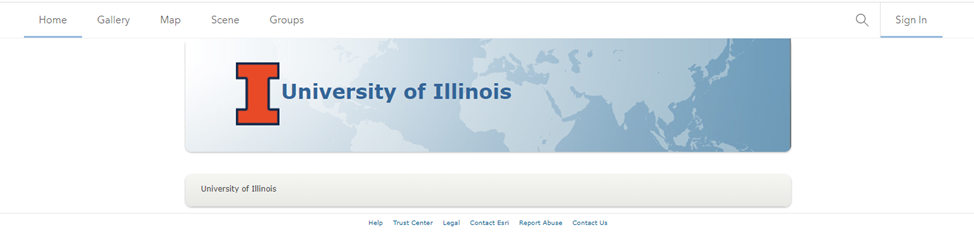
1. To use ArcGIS Pro 3.x, an activated ArcGIS Online account is required. The following ArcGIS online resources require you to sign in through the University of Illinois ArcGIS Online Organization portal.
https://univofillinois.maps.arcgis.com · ArcGIS Online · ArcGIS Pro, · Community Analysts Online · Business Analysts Online · ESRI eLearning · GeoPlanner for ArcGIS |
|
|
|
2. Open a browser tab and go to the link above. https://univofillinois.maps.arcgis.com
|
|
|
|
|
|
|
|
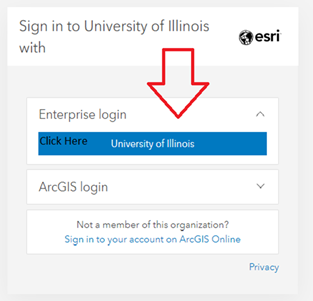
3. Click the Sign In link on the upper right side of the page. Click to the blue University of Illinois button to select the Enterprise login. (Detailed instructions are included in the guide to ESRI Single Sign On.) |
|
|
|
|
|
|
|
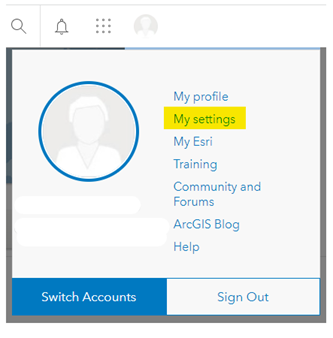
4. At the top of the page, click your username and click My settings. |
|
|
|
|
|
|
|
5. Your user type, role, and assigned licenses (including the bundled ArcGIS Pro Extensions with your plan) are listed. If you do not see ArcGIS Pro listed under your licensed products, or if the Download button does not appear, use the download links from your WebStore order or contact webstore@illinois.edu. |
|
|
|
|
|
|
|
6. Next to ArcGIS Pro, there should be a download option for the app. You can download the installation files here or from your order in the WebStore. |
|
|
|
7. Once you have the executable file downloaded to your computer, you can begin the installation. |
|
|
|
|
|
|
|
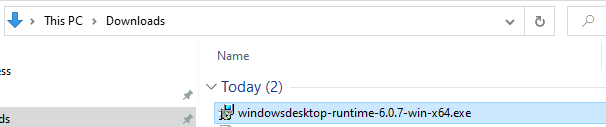
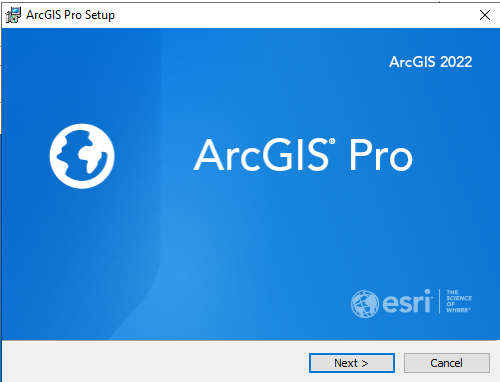
8. Double click the installation file to begin. |
|
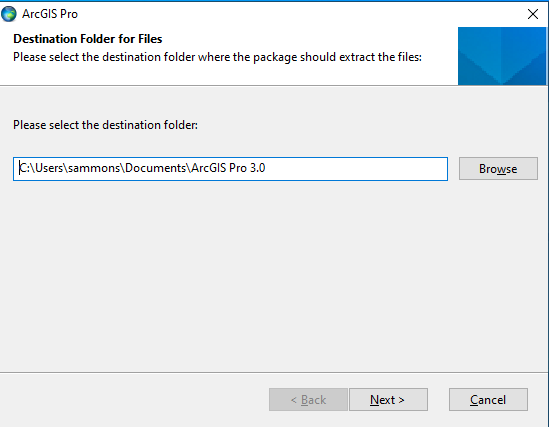
9. Choose the destination folder. WebStore recommends you keep this option default for ease of support. The default destination folder is <System Drive>\Users\<username>\Documents\ArcGIS Pro <version>. |
|
|
|
|
|
|
|
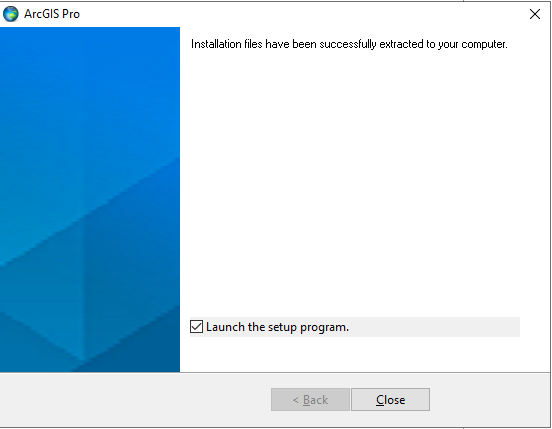
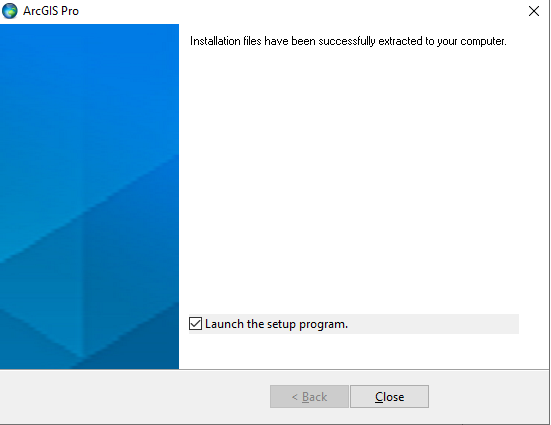
10. After the setup wizard has unpacked the files, a new window will open. Launch the setup program should be checked. Click Close. |
|
|
|
|
|
|
|
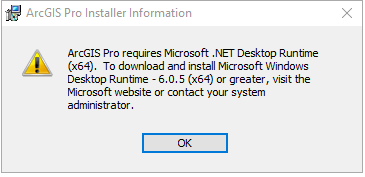
11. You may get a message that you need to update the Microsoft .NET Desktop Runtime application. |
|
|
|
|
|
|
|
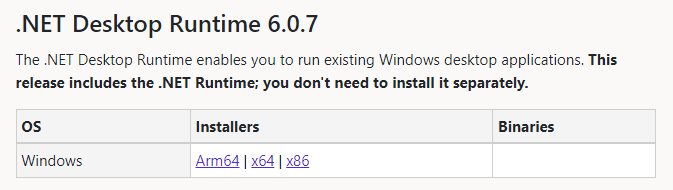
12. Go to https://dotnet.microsoft.com/en-us/download/dotnet/6.0 and choose “.NET Desktop Runtime” for your computer system. (Select the latest release available which may past the version shown on this guide.) |
|
|
|
|
|
|
|
13. Once the executable is downloaded double click to launch and install it. |
|
|
|
|
|
|
|
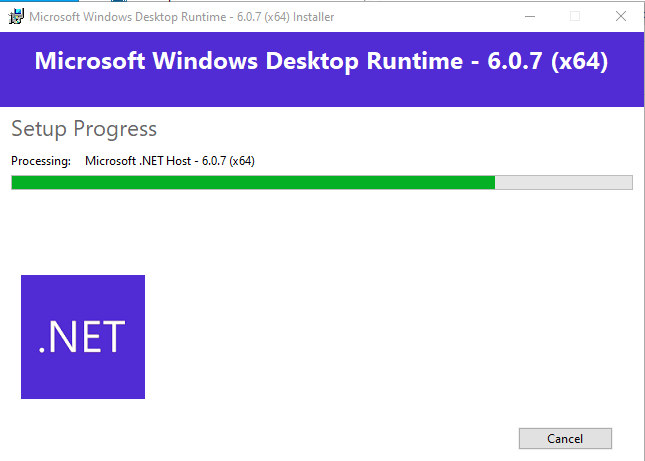
14. The Installer will run. |
|
|
|
|
|
|
|
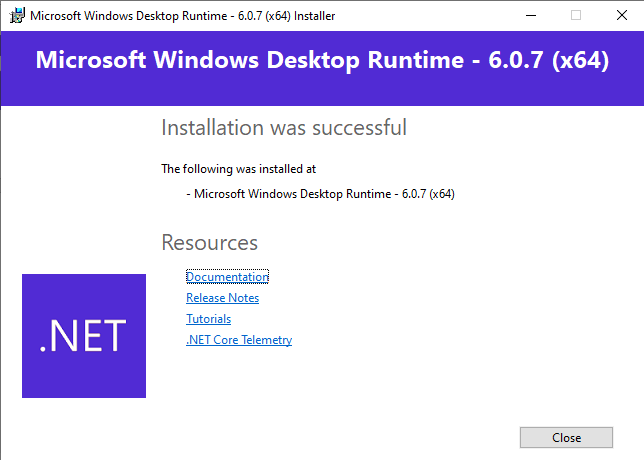
15. You will get a confirmation that the plugin was successfully installed. |
|
|
|
|
|
|
|
16. Resume the install process by double clicking the ArcGIS Pro 3.x.exe |
|
|
|
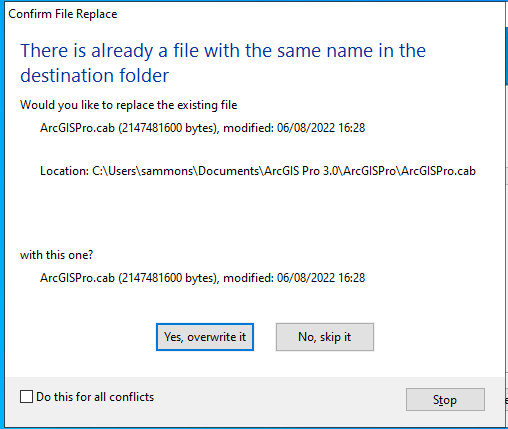
17. You may get this message about whether to overwrite or skip one of the installation files. These files were written during the first attempt to install. Check the box for “Do this for all conflicts” and choose overwrite or skip. It does not matter. |
|
|
|
|
|
|
|
18. You will get another confirmation that all files have been extracted. |
|
|
|
|
|
|
|
|
|
19. Click Next. |
|
|
|
|
|
|
|
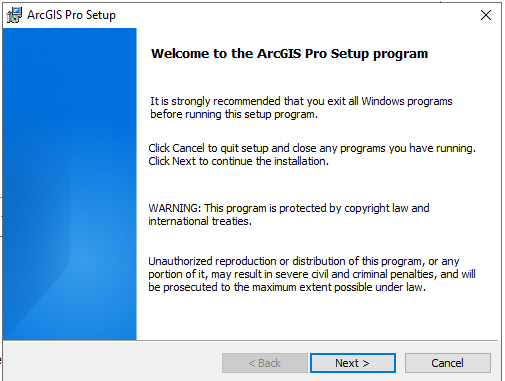
20. Exit your Windows programs and click Next to continue the setup. |
|
|
|
|
|
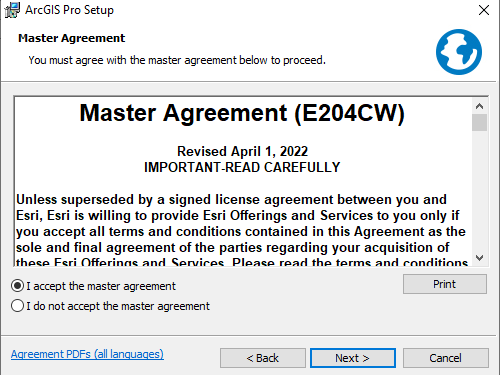
21. Choose, I accept the master agreement. |
|
|
|
b |
|
|
|
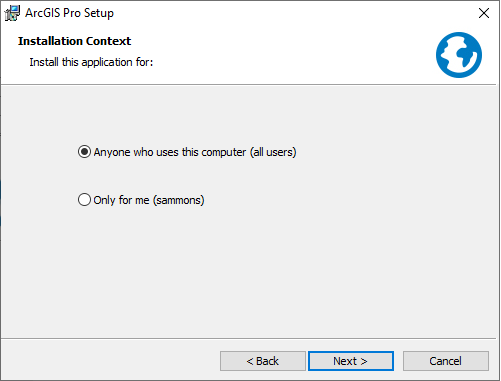
22. Choose who will be able to use the application. Click Next. |
|
|
|
|
|
|
|
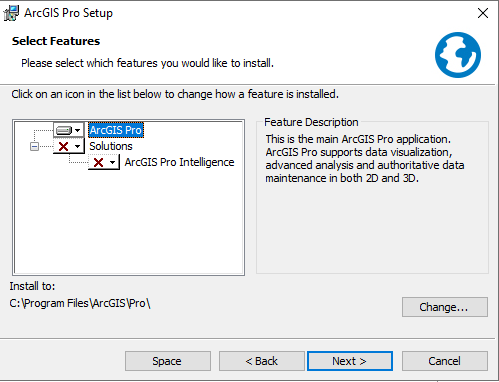
23. Select any optional features and the location that you would like to install to. Accept the default location if you are not sure. Click Next. |
|
|
|
|
|
|
|
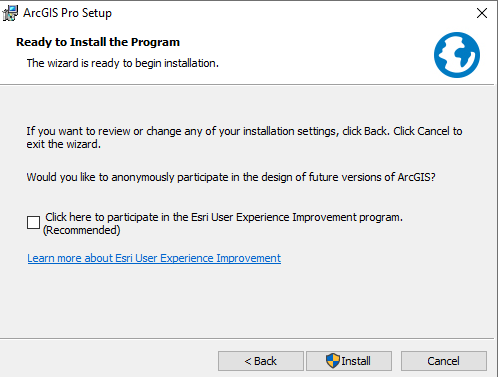
24. Choose whether to participate in the ESRI User Experience. Click Install to begin. |
|
|
|
|
|
|
|
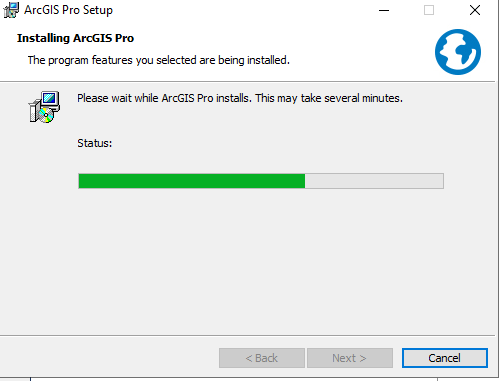
25. The installation will proceed. |
|
|
|
|
|
|
|
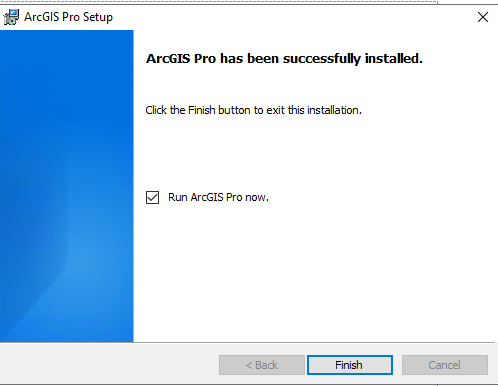
26. ArcGIS Pro is now installed. Click Finish to launch the application. |
|
|
|
|
|
|
|
27. An ArcGIS Online account is required to license the software. Your ArcGIS Enterprise account is created the first time you sign into the University’s ArcGIS Online site. If you have never signed into the University’s ArcGIS Online site, please do so now before attempting this step. Browse to https://univofillinois.maps.arcgis.com, click Sign In and choose University of Illinois.
|
|
|
|
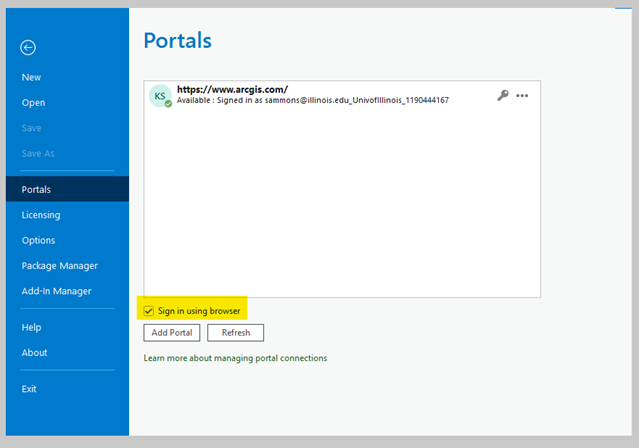
28. ***For users with existing ArcGIS Online accounts and/or previous installs of ArcGIS Pro, a new install of ArcGIS Pro must still connect to your ESRI online account to validate the license. If you are having problems connecting to ArcGIS online to authorize the software, go to Settingsà Portal and verify that the portal address is “www.argis.com”, and that the checkbox “Sign in using browser” is selected. An active internet connection and browser login is required to validate your license. |
|
|
|
|
|
|
|
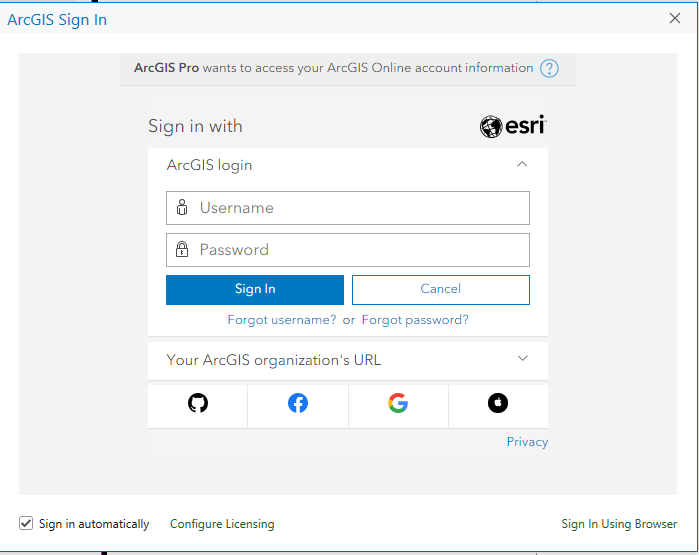
29. To proceed set the ArcGIS organization URL, click the down arrow in the field below. |
|
|
|
|
|
|
|
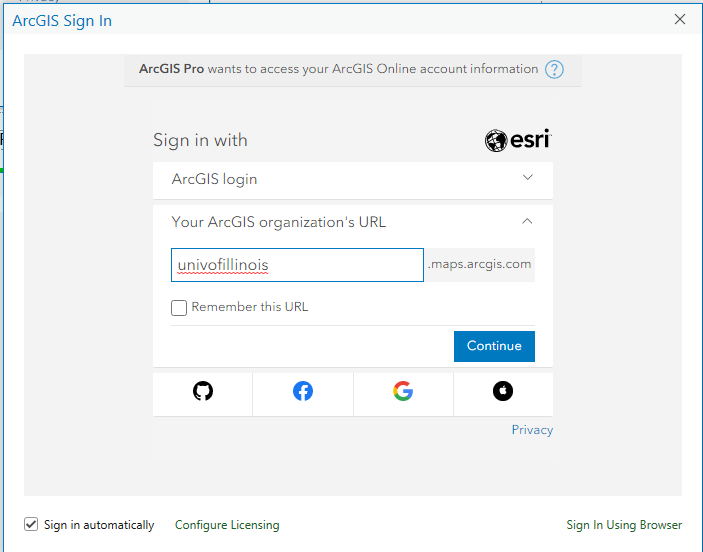
30. Enter ‘univofillinois’ and click the box next to Remember the URL. Click Continue. |
|
|
|
|
|
|
|
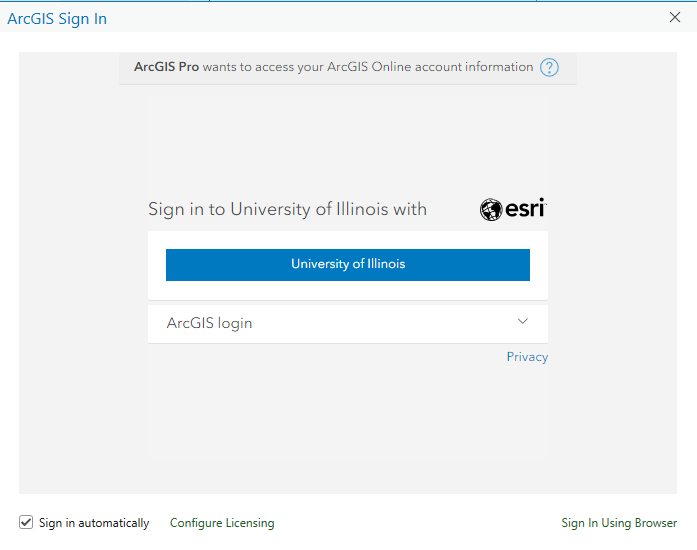
31. You should see the screen below. Click on the University of Illinois. |
|
|
|
|
|
|
|
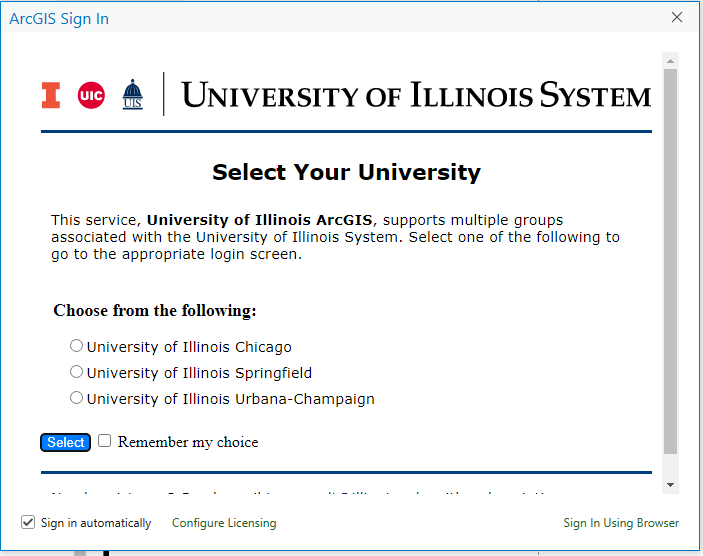
32. Select the appropriate Campus. You will be redirected to your campus login page. Use your NetID and password |
|
|
|
|
|
|
|
33. Once logged into ArcGIS Pro you may get prompted to update. Please install any available updates or install the most current Patch from your WebStore order history. |
|
|
|
|
|
|
|
|
|
|