|
|
|
|
ERDAS Imagine 2018 Student Installation Instructions |
|
|
|
|
|
|
|
|
|
|
|
1.
You will need to download two files imagine-v16.5-win-x64.zip
and IMAGINE-v16.5.1-win-x64.zip. Please extract these files before installing
the software. In our example we are extracting the files to the desktop of
the computer. |
|
|
|
|
|
|
|
|
|
|
|
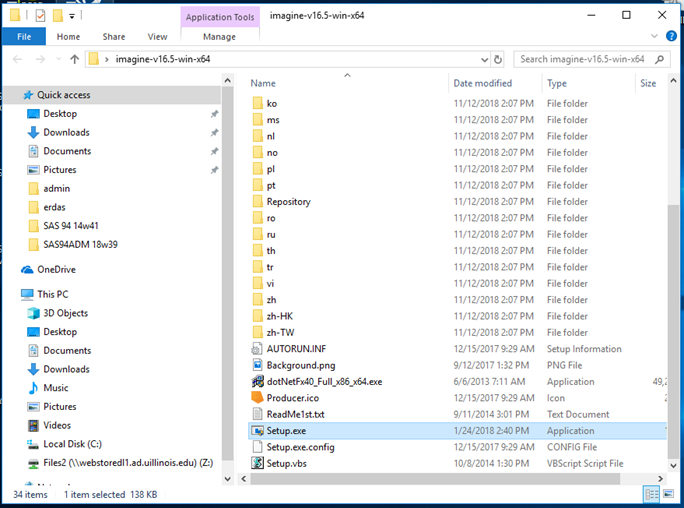
2.
Open the folder you extracted the file to and double
click setup.exe. |
|
|
|
|
|
|
|
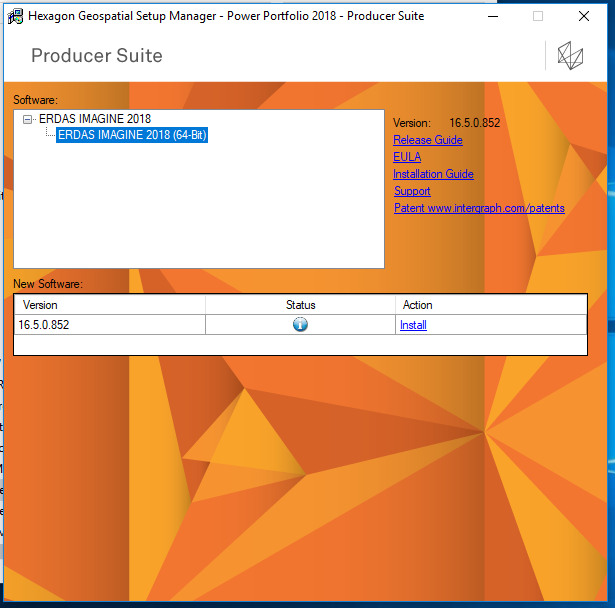
3.
Expand the +. Select ERDAS Imagine 2018 and click on Install. |
|
|
|
|
|
|
|
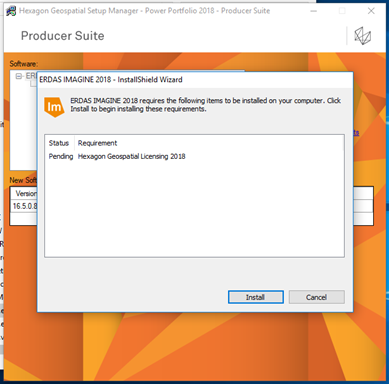
4.
Click on Install. |
|
|
|
|
|
|
|
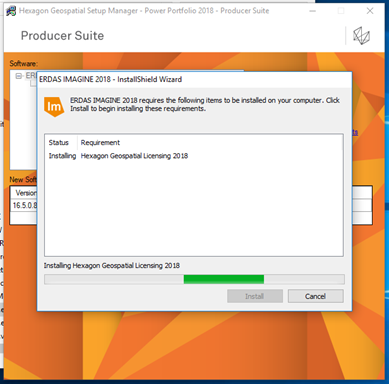
5.
ERDAS IMAGINE 2018 installation will begin. |
|
|
|
|
|
|
|
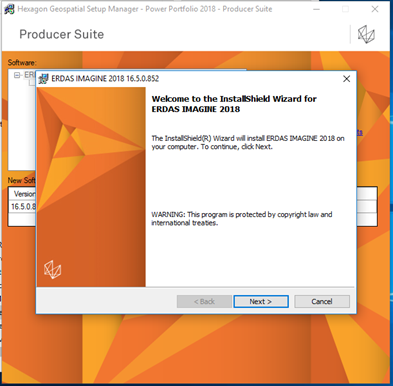
6.
You will see the below window. Click on Next. |
|
|
|
|
|
|
|
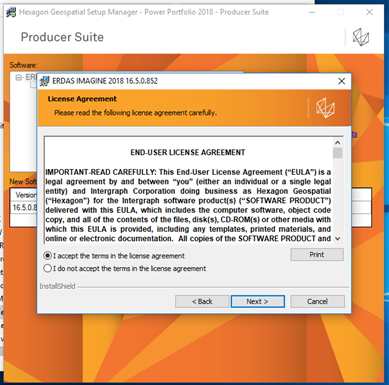
7.
Agree to the license agreement and click Next. |
|
|
|
|
|
|
|
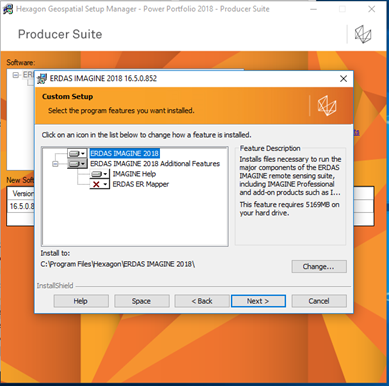
8.
Click on Next. |
|
|
|
|
|
|
|
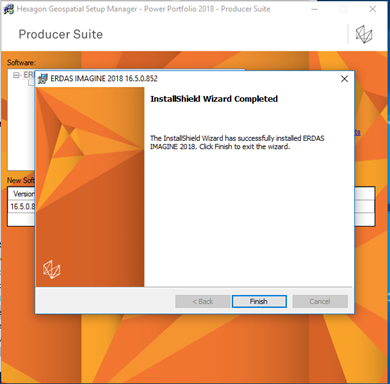
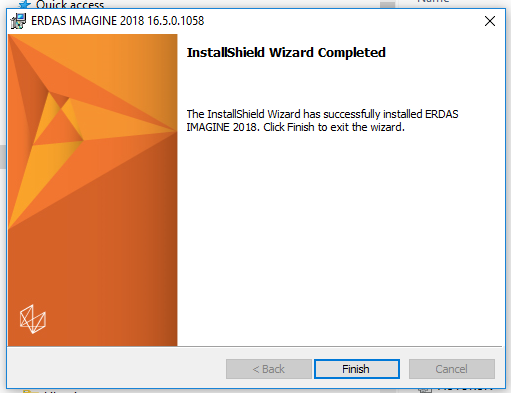
9.
Click Finish. |
|
|
|
|
|
|
|
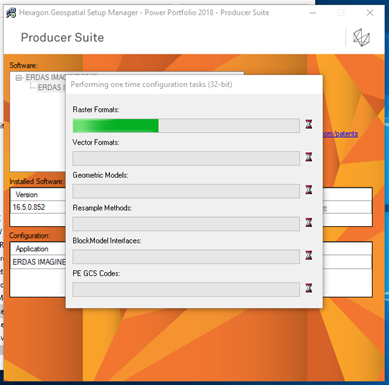
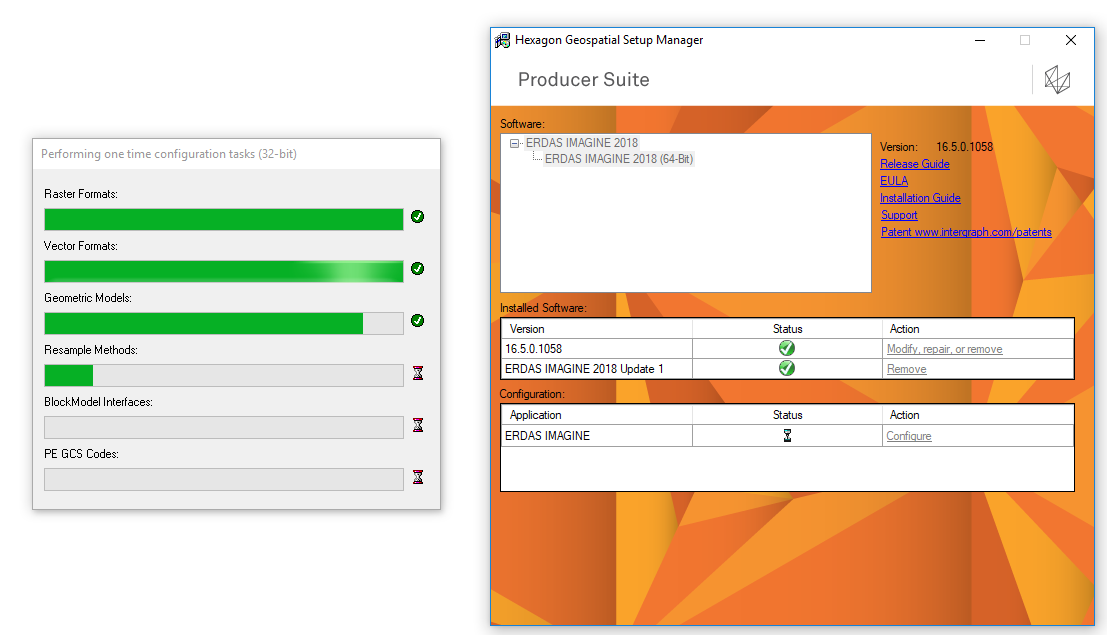
10. Next this
configuration window will open. |
|
|
|
|
|
|
|
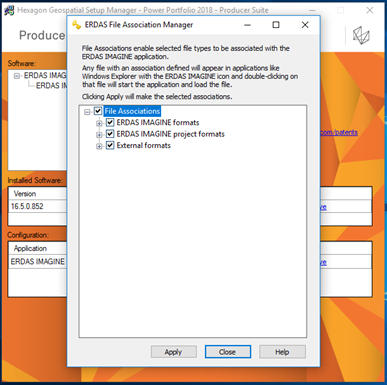
11. Choose to create the
file associations (Optional) by checking the boxes. Click Apply and then Close. |
|
|
|
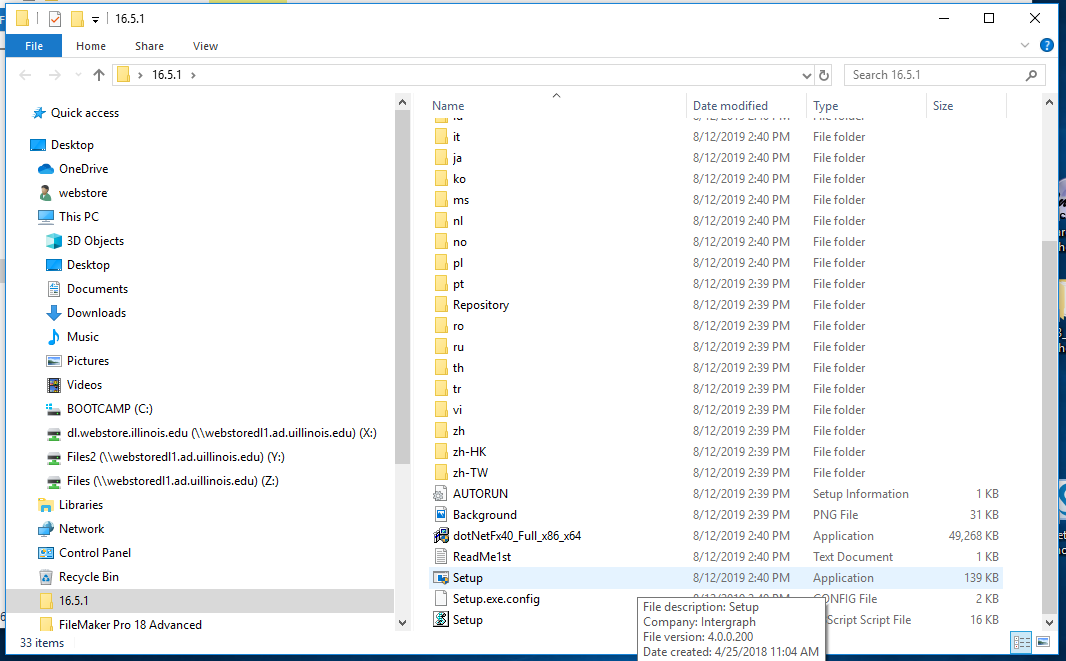
12. Now go to your file
folder containing the setup file for the 16.5.1 update. Right click and choose ‘Run as
administrator’.
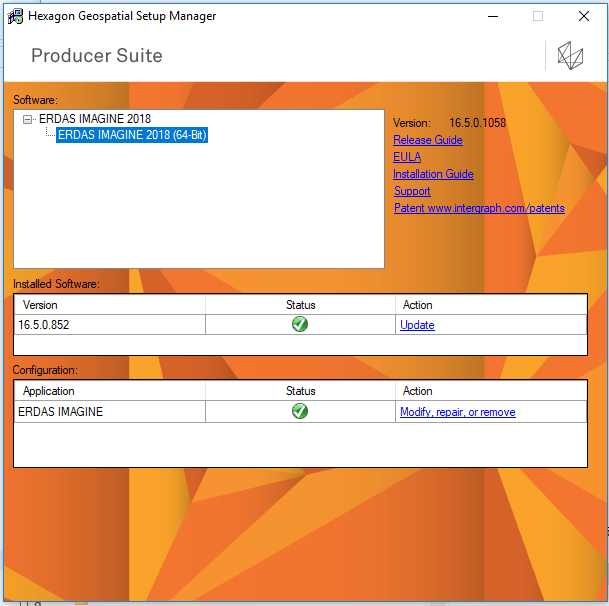
13. Expand the option ‘Erdas Image 2018’. Choose
the install you wish to update (There should only be one there!)
Click the ‘update’ link under action for the version you wish to update.
|
|
|
|
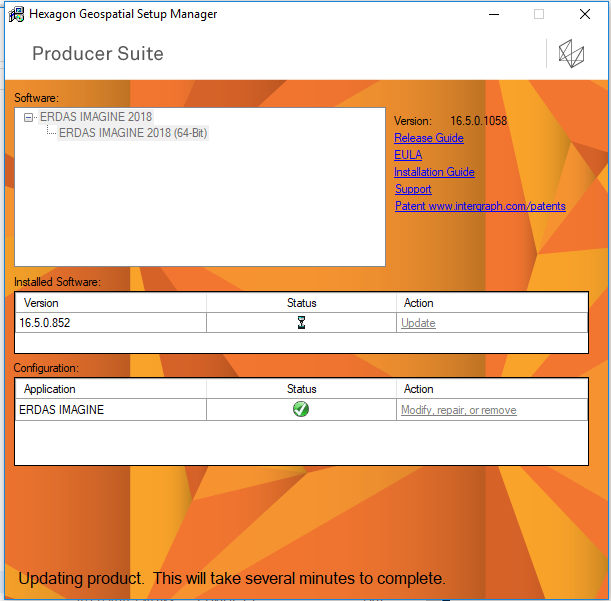
14. Your update will start soon, be patient.
|
|
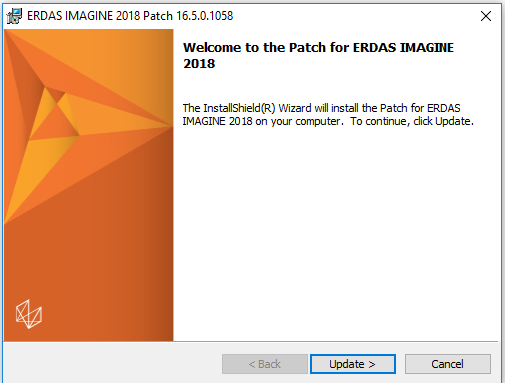
15. Click ‘Update’.
|
|
|


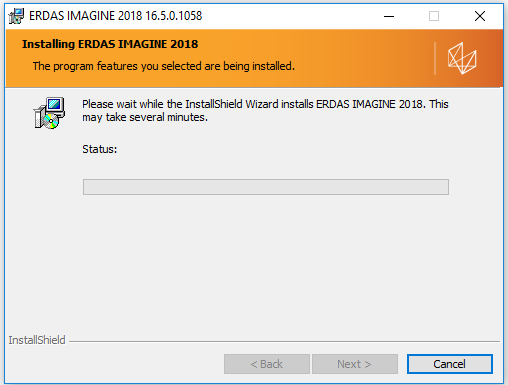
16. Your ERDAS is now updating.
17. Click
finish.
18. ERDAS
will update its own files.
19. Apply any File association and click
close. Open ERDAS from the start
menu. Click OK.
20. /////////////////////////// STUDENTS
//////////////////////////////////////////////////////////
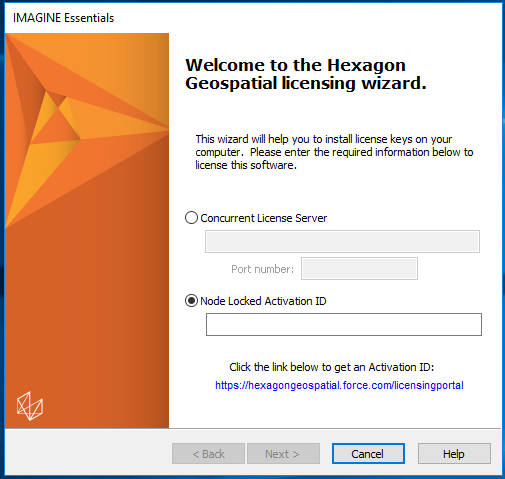
Choose
NODE LOCKED ACTIVATION and use the
code from your Order History.
Follow on screen instructions and you are now ready to use
ERDAS. Congratulations on a job well
done.