|
Creo 4 Installation
Instructions |
|
|
|
Due to
firewall restrictions, particularly on off-campus and wireless connections,
you will need to connect to your campus VPN service before installing
and to use this software. |
|
|
|
|
|
1.
Download the .zip file from your WebStore order history. |
|
|
|
|
|
|
|
2. Right
click on the .zip file and choose extract all from the menu. Accept the
default location to extract the files or set a location of your choice. |
|
|
|
|
|
|
|
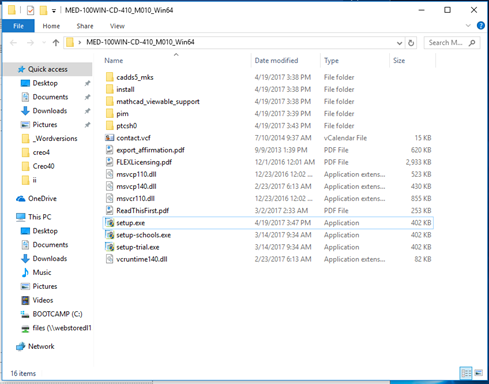
3. Open
the folder and double click setup.exe. |
|
|
|
|
|
|
|
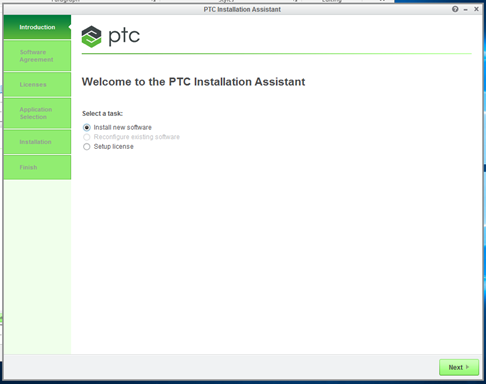
4. The
installer will initialize. Click Next. |
|
|
|
|
|
|
|
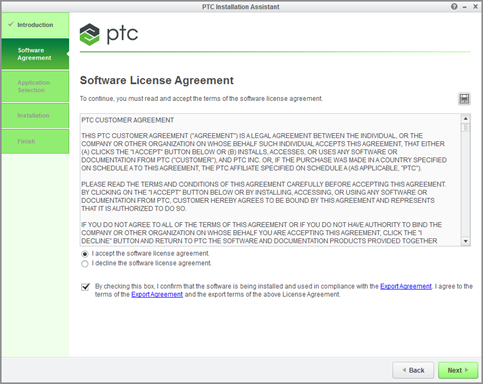
5. Accept
the license agreement and click Next. |
|
|
|
|
|
|
|
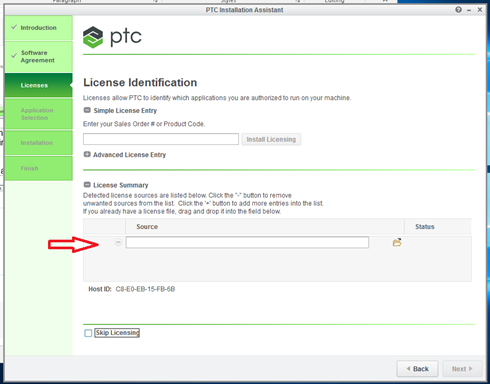
6. Select
License Summary, enter the license server information and click on Next.
The the server information was provided to you when you purchased the
software. You can retrieve this information by logging into the WebStore and
clicking on Order History. Find this offer on your list and click on the
order number. Click Next. |
|
|
|
|
|
|
|
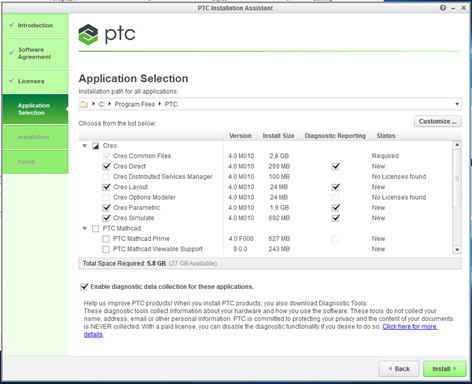
7. Select
the applications that you would like to install and click Install. |
|
|
|
|
|
|
|
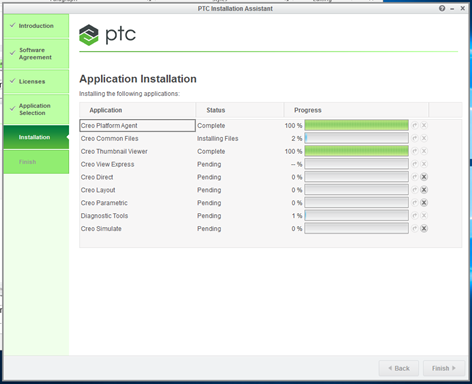
8. The
installation will begin and may take several minutes. Click Finish when done. |
|
|
|
|
|
|
|
You are now ready to use PTC Creo 4 for Windows. Remember
that you will need to use the VPN if accessing this software from off campus. |