![]()
|
AutoDesk 2016 for Mac Installation
Instructions |
|
|
|
|
|
In our
example we will be installing AutoCad 2016. The
process to install other AutoDesk software will be
similar. |
|
|
|
Due to
firewall restrictions, you will need to the your campus VPN service before
installing and to use this software if you are on an off-campus connection. |
|
|
|
Mac |
|
|
|
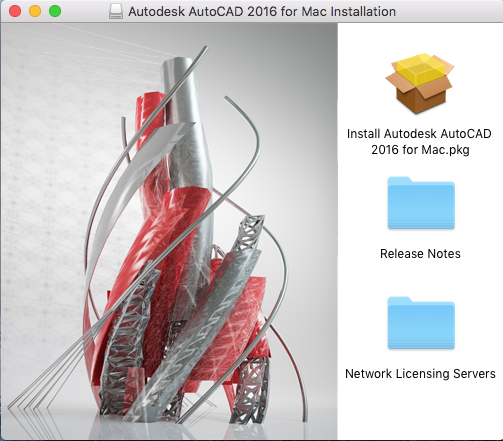
1.
Double click on the .DMG file you downloaded from the
Webstore. The following window will pop up. Double click Install Autodesk AutoCAD 2016 for Mac. |
|
|
|
|
|
|
|
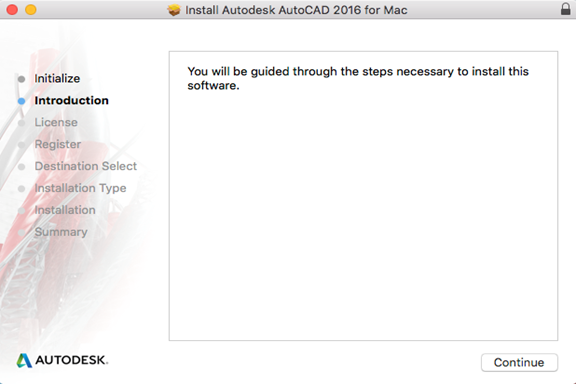
2.
Click Continue. |
|
|
|
|
|
|
|
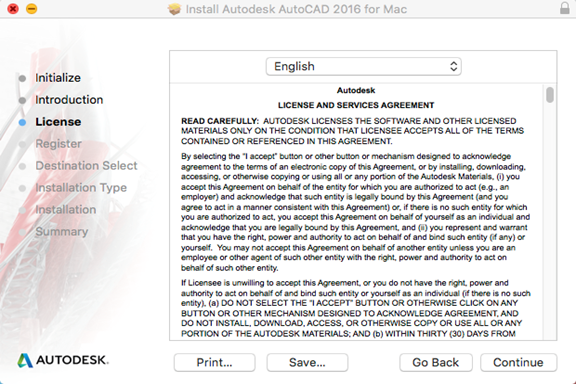
3.
Click Continue. |
|
|
|
|
|
|
|
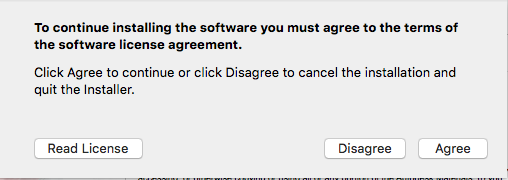
4.
Accept the license agreement by clicking on Agree. |
|
|
|
|
|
|
|
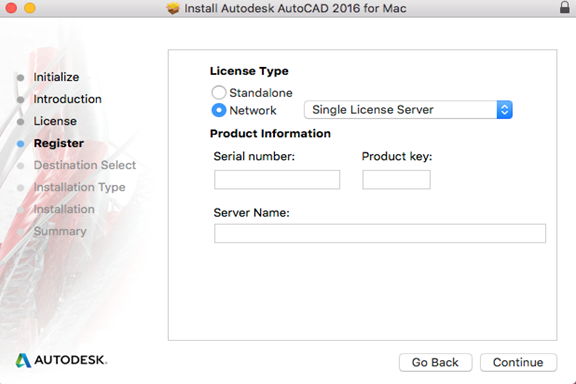
5.
Select the Network license type, select Single License Server from the drop
down menu, and enter the serial number, product key, and server name. These were provided
to you when you purchased the software. To retrieve this information, login
to the WebStore and click on Order History. Click
on the order number. |
|
|
|
|
|
|
|
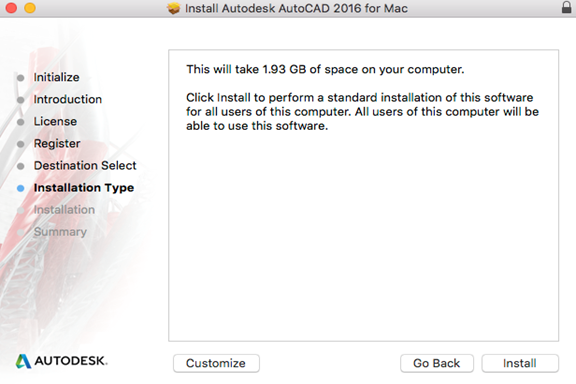
6.
Click Install. |
|
|
|
|
|
|
|
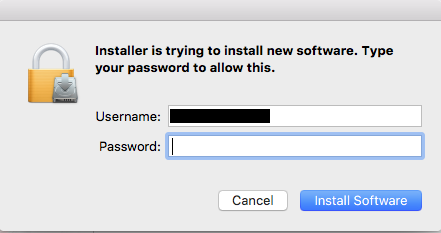
7.
The AutoDesk installer requires
administrative access. Enter the username and password of an account with
administrative privileges and click Install
Software. |
|
|
|
|
|
|
|
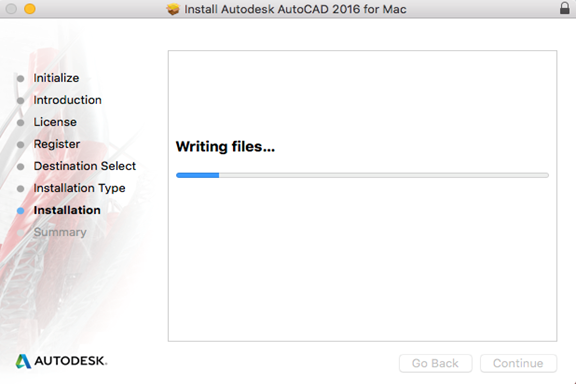
8.
The installation will begin and may take several minutes.
When it completes, click Finish. |
|
|
|
|
|
|
|
You are
now ready to use AutoDesk 2016 for Mac. Remember: Due to firewall restrictions, you will need to use your campus VPN service to use this software if you are on an off-campus connection. |